
SQL Server Logshipping between WORKGROUP Machines
Step 1: Connect the two computers with a crossover Ethernet cable.
Step 2: After connecting, setup IP address manually within the same range on both the computers.

Step 3: Next goto control panel->Network and Internet->Network and Sharing Center->Advanced sharing settings
- Turn on network discover, folder sharing and use 128-bit encryption to help protect files sharing connections (recommended) and turn off password protected sharing options on both the computers.

Step 4: Share the folder to the network path, where you want to perform the backup and copy operation for log shipping and give full control to logon name sql server agent account for that particular folder.

The sharing permission name should match the logon name on the sql server agent.
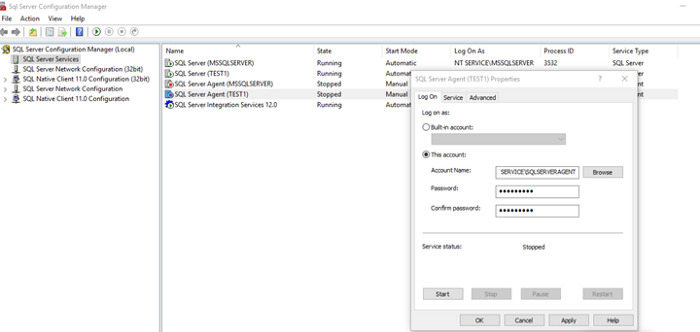
Step 5: Suppose windows will prompt the “windows cannot access error” you won’t be able to access the computer and shared folders over the network path, you will get error dialogue box as shown below,
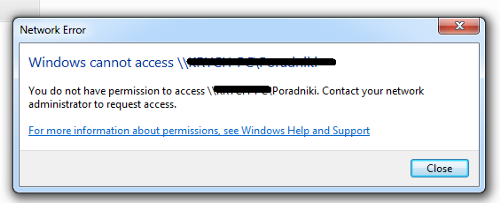
To fix this error make sure to enable guest logons on both the computers. Goto computer configuration-> Administative Template -> Network-> Lanman workstation-> enable logons.

Step 6: Use ping command to verify if both PCs can communicate over the network with another computer.
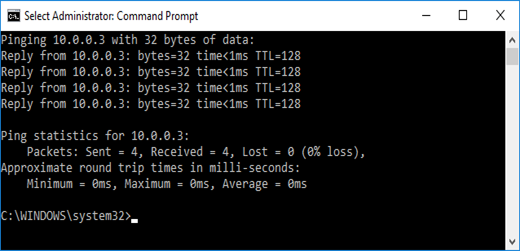
Step 7: Now, the workgroup Pcs are ready for log shipping. Next on the primary instance, create database and set DB to Recovery model full. Now we need to back up the DB on the primary instance.
First , backup DB full
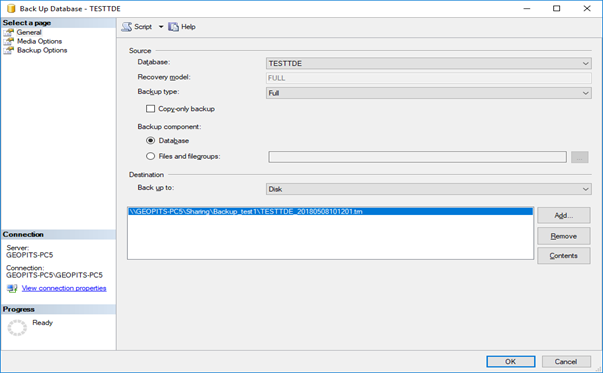
Second , backup transactional Log

Step 8: Next change to second instance and perform the restore operation.
First , restore DB full with NoRecovery. Same as this step, now restore Transactional log with NoRecovery / with Standby option

Step 9: On the primary instance, click on the DB select properties and Transactional logshipping option and tick enable this as primary DB logshipping configuration.
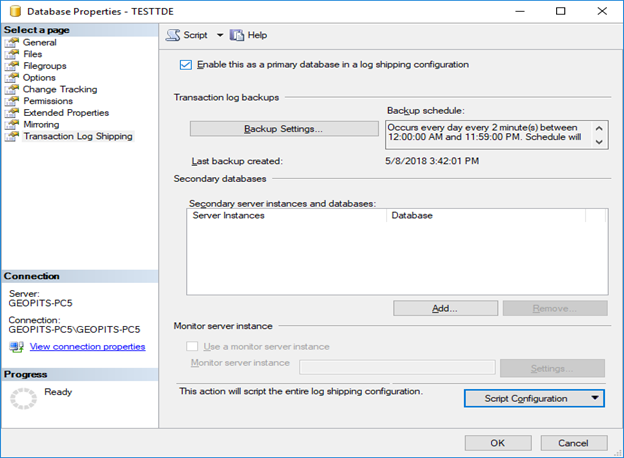
Step 10: Next step is to select backup setting button and set the logshipping job on the primary instance to configure the path for log backup, we can tune the delete files and the compression behavior options depending on our requirements.

Step 11: Next, click add button on database properties screen to initialize secondary instance DB and click on connect button to connect the secondary server where you want the logshipping configured. On the same page, click next tab called copy files to configure the destination folder. This folder is usually located on the secondary server destination, where the backup files are copied. Next, we can click on schedule button on the same screen for scheduling the date & time for the copy occurrences.
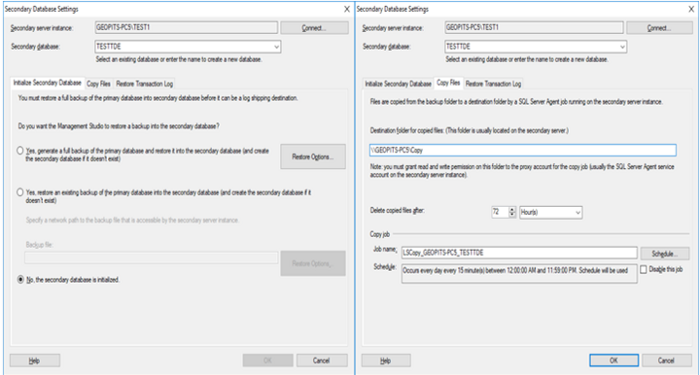
Step 12: On the secondary database settings click on the restore transactionlog button for restoring the copied files to the secondary instance DB. We can now set the DB back up state to Norecovery/standby mode depending on our requirements. Next, up click on schedule button to schedule restore job and set the date & time occurrences.

Step 13: Finally click on the ok button to finish the configuration settings. Now the logshipping is configured and ready for shipping.


